
Today I want to show a step-by-step tutorial how to build a simple Eclipse RCP 3.x application based on Eclipse Mars.
Motivation
-
There exists many Eclipse RCP 3.x applications, which cannot be moved to the latest Eclipse RCP version.
-
There are a few descriptions in the internet what must be done to use the Compatibility Layer, but no step-by-step tutorial
Background
-
If you not know what the compatibility layer is than read this https://www.eclipse.org/community/eclipse_newsletter/2013/february/article3.php
-
If you want more background information about migrating strategies of Eclipse RCP 3.x than read this http://eclipsesource.com/blogs/2016/01/08/migrating-from-eclipse-3-x-to-eclipse-4-e4/
Prerequisite
-
Download Eclipse RCP and RAP for Mars from here http://www.eclipse.org/downloads/packages/eclipse-rcp-and-rap-developers/mars2
Tutorial
To create a simple feature-based Eclipse RCP 3.x application we need for plug-ins:
-
One plug-in with UI logic (here only an example table): io.rage5474.rcp.example.ui.plugin
-
One feature plug-in with represents the feature for the UI plug-in(s): io.rage5474.rcp.example.ui.feature
-
One target platform plug-in, which contains only the taegt platform file: io.rage5474.rcp.example.tp
-
One product plug-in, which contains the product configuration: io.rage5474.rcp.example.product
So let us start.
Create sample plug-in
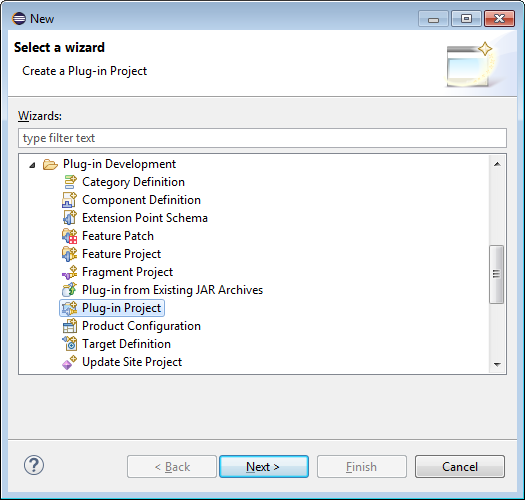
First we create the plug-in io.rage5474.rcp.example.ui.plugin with our simple application logic. Therefore we use the integrated plug-in generator. Go to File → New → Other and select Plug-in Project from the folder Plug-in Development.
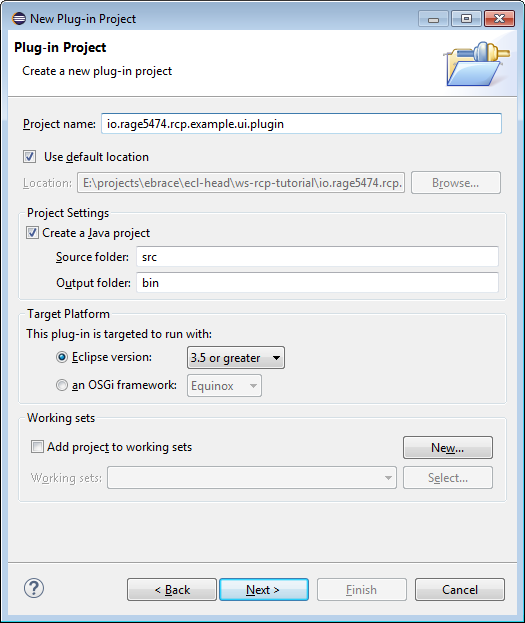
After clicking Next you have to add your plug-in name, here io.rage5474.rcp.example.ui.plugin.
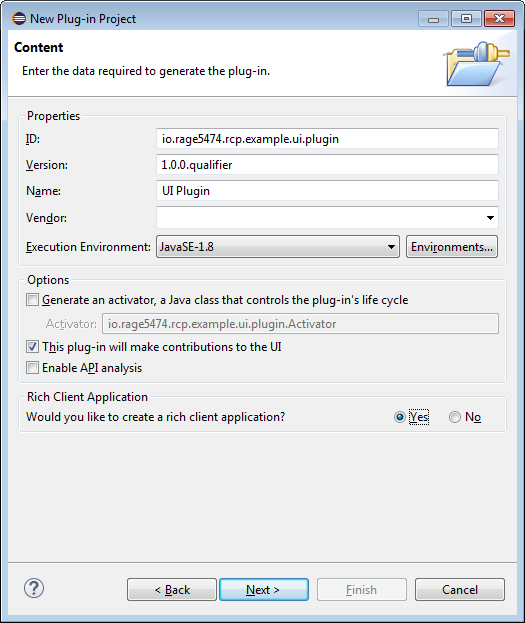
After clicking Next we have to select the option Would you like to create a rich client application? to Yes.
Again a click on Next leads us to the plug-in generator. Select here RCP 3.x application with a view
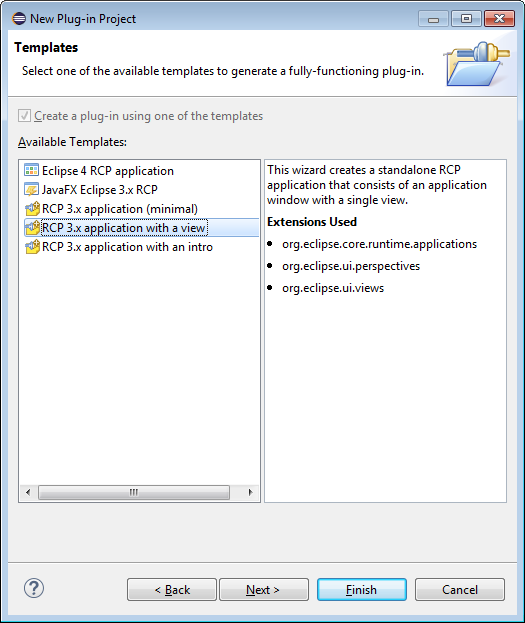
and Finish the dialog. In the end you should have a new plug-in in your workspace, that looks similar to this one:
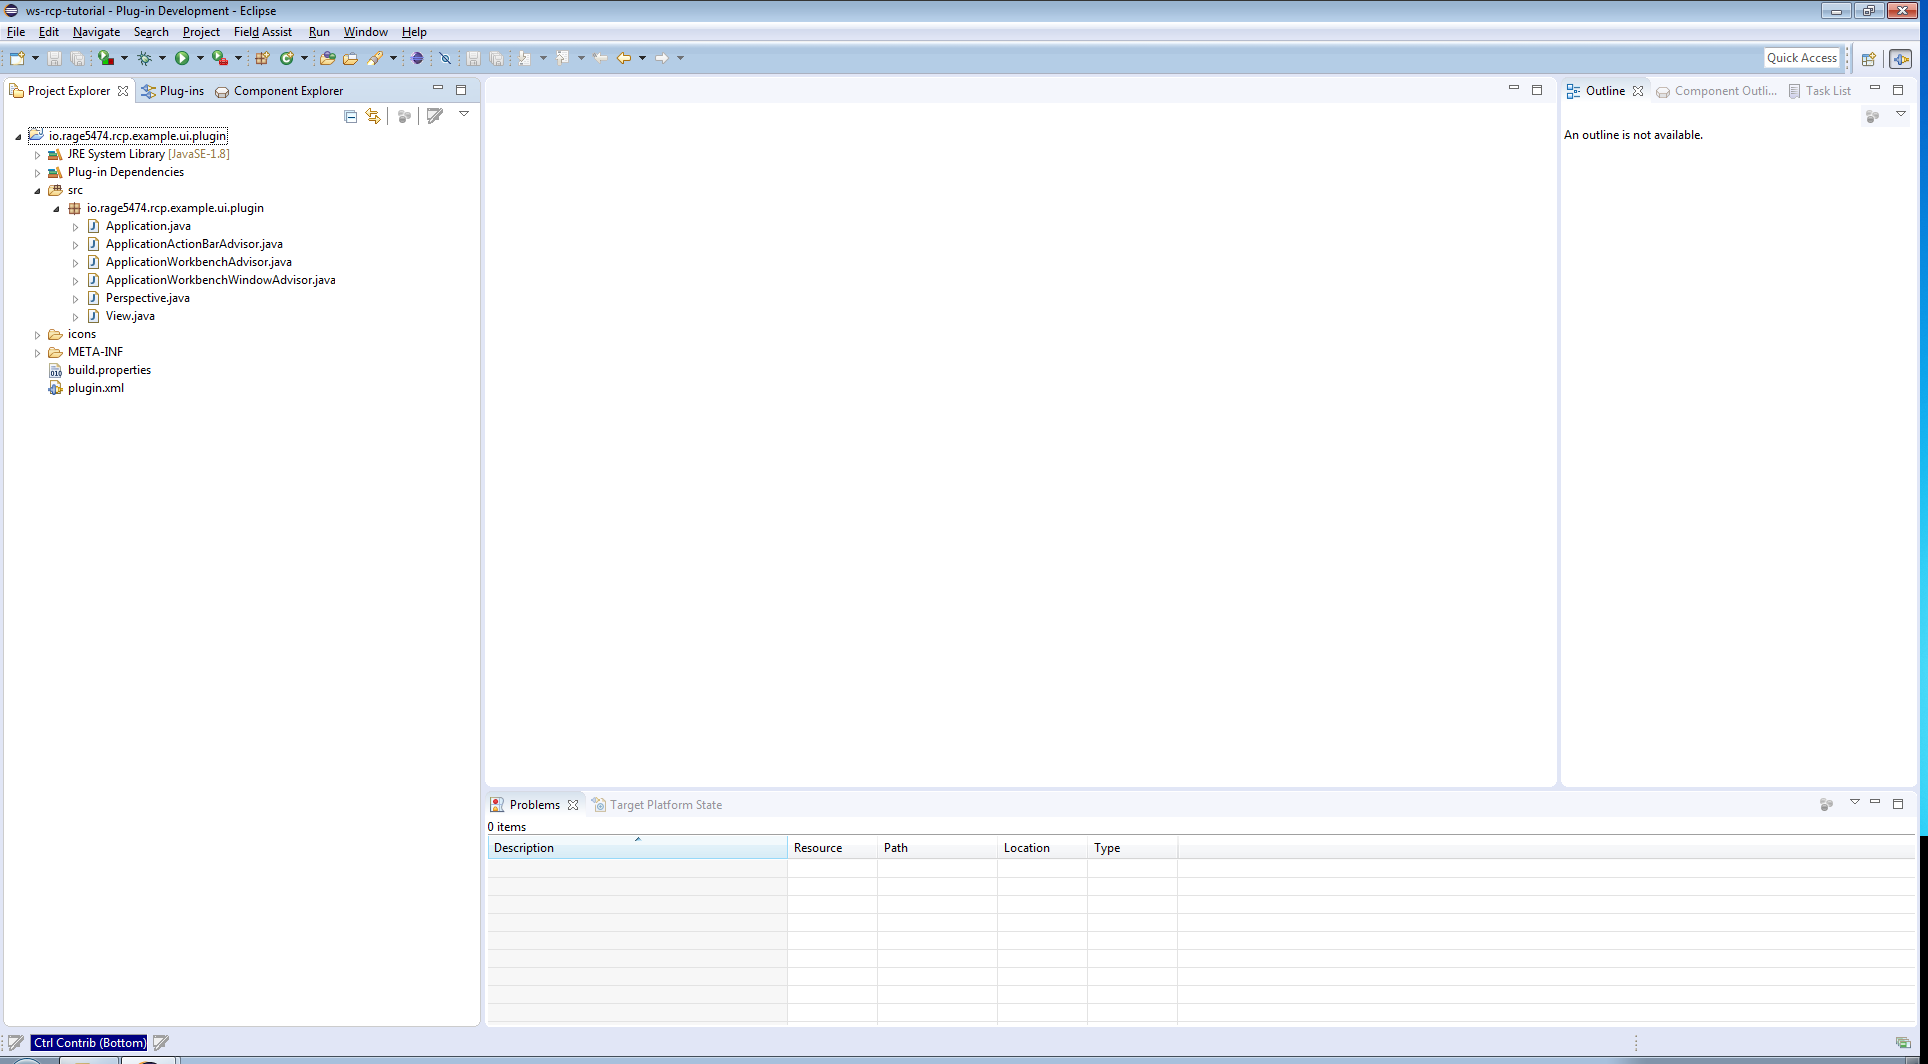
Cool, first step was successful. Let us go on.
Create sample feature
As I think it is better to work with feature (groups of plug-ins) instead of working only with plug-ins, we have to create a feature plug-in, that contains in the end only one plug-in. We name the feature plug-in io.rage5474.rcp.example.ui.feature.
So start again with File → New → Other and select Feature Project from the folder Plug-in Development. Enter the feature name io.rage5474.rcp.example.ui.feature and click Finish.

Now you should have a second plug-in in your workspace. Open the file feature.xml (simply be double-click), which is located in io.rage5474.rcp.example.ui.feature. Go to the tab Included Plug-ins on the bottom of the editor and click Add. A new window should come up. Select the plug-in with the name io.rage5474.rcp.example.ui.plugin and click OK.
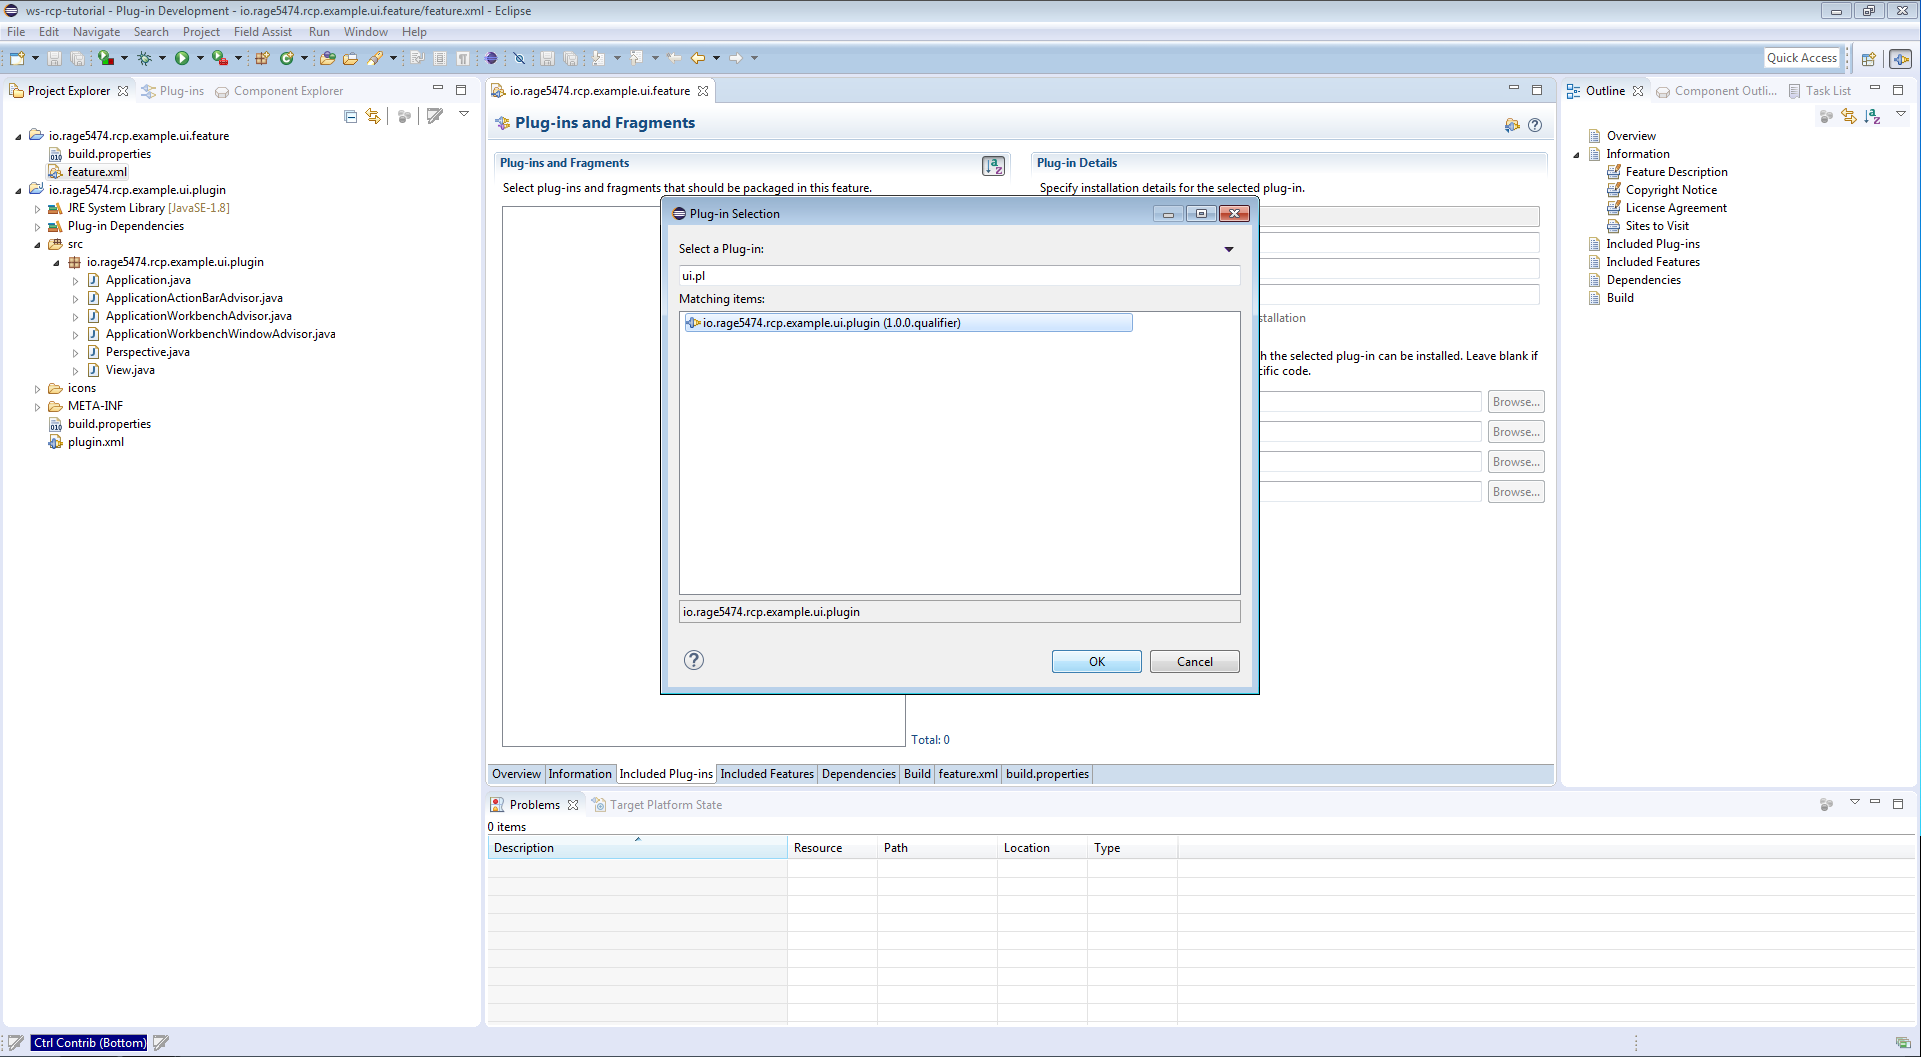
Save the feature.xml file (CTRL-S).
So step 2 was also successful!
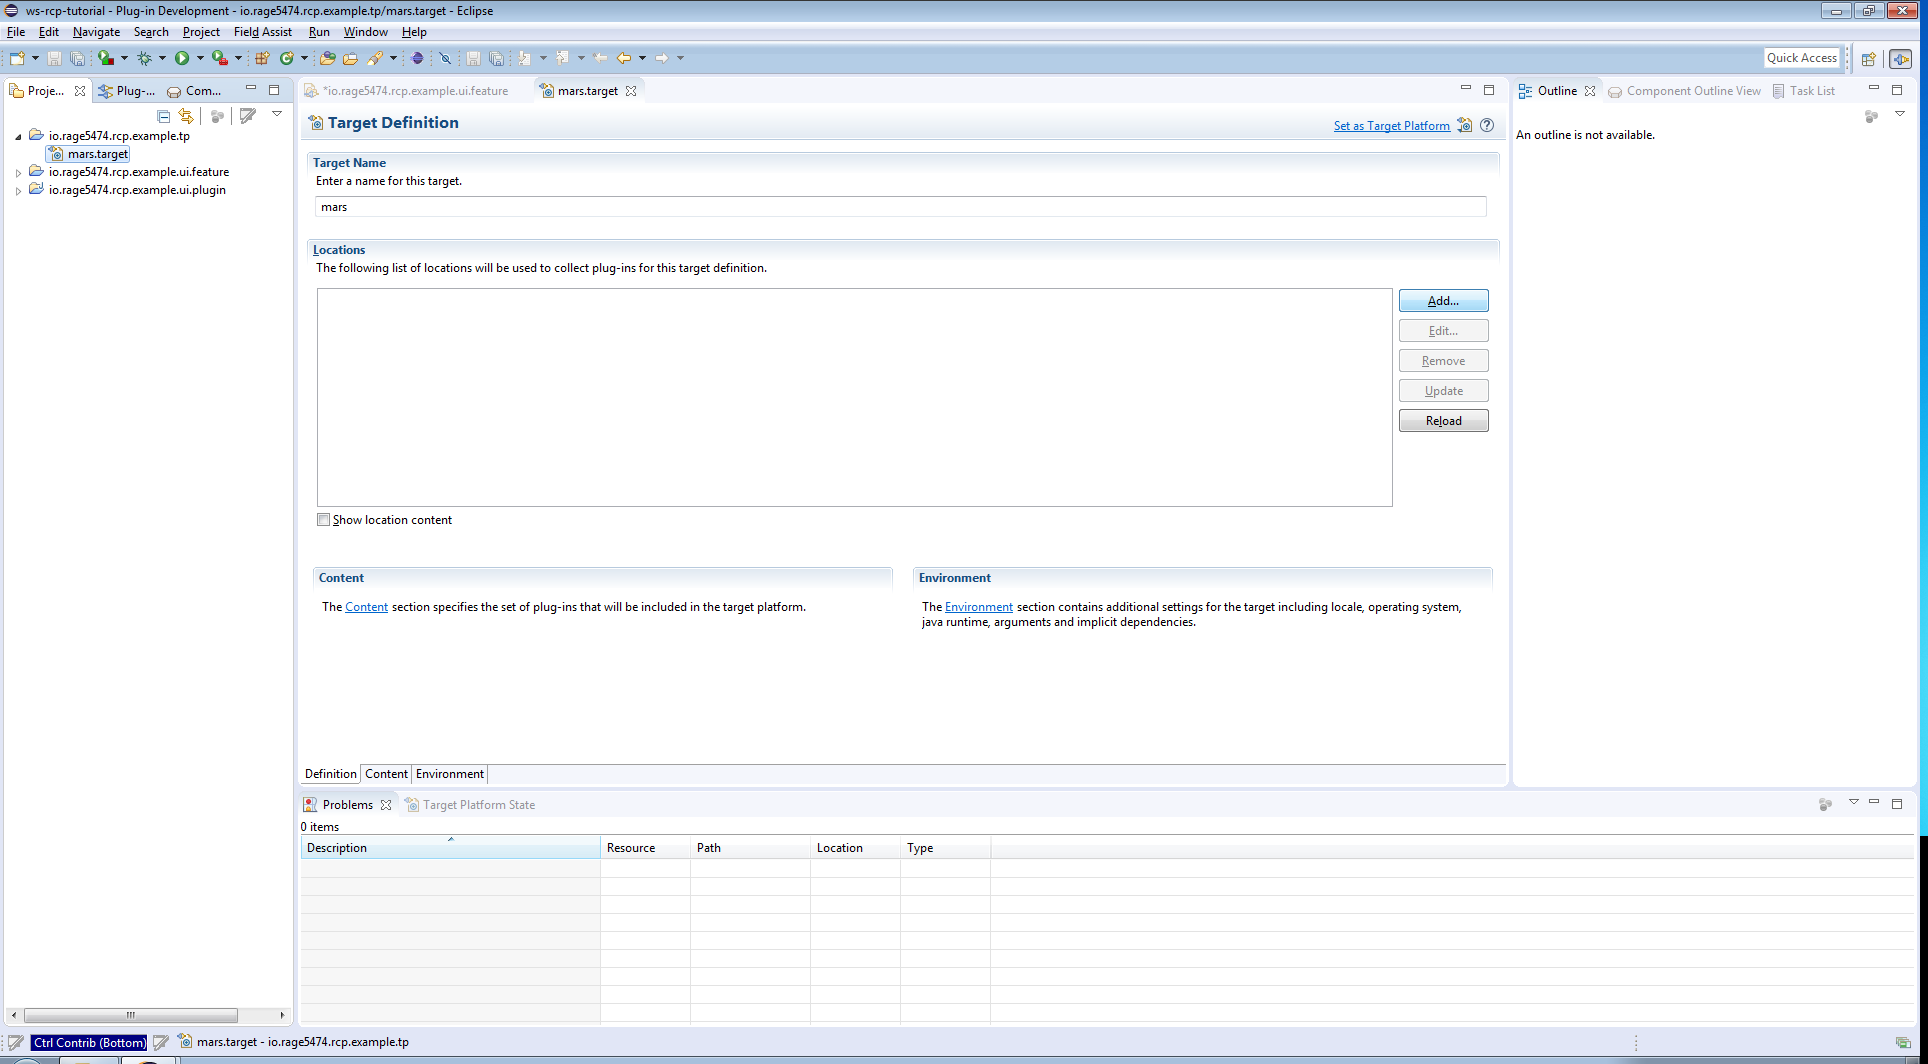
Create target platform plug-in
Now we must create our target-platform (contains all Eclipse RCP plug-ins we need to get our application running!). I decided to use here Eclipse Mars as target platform. So we put the target platform file in a separate plug-in. We start again with File → New → Other and select Project from the folder General. Enter the corresponding plug-in name, here io.rage5474.rcp.example.tp and click Finish.

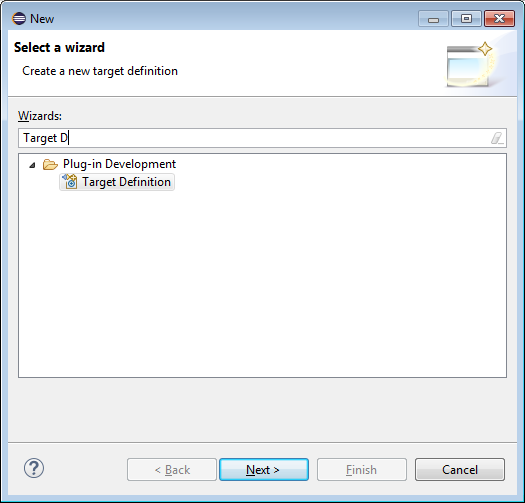
Now we add a Target Definition file to this project. Go to File → New → Other and select Target Definition from the folder Plug-in Development and click Next.
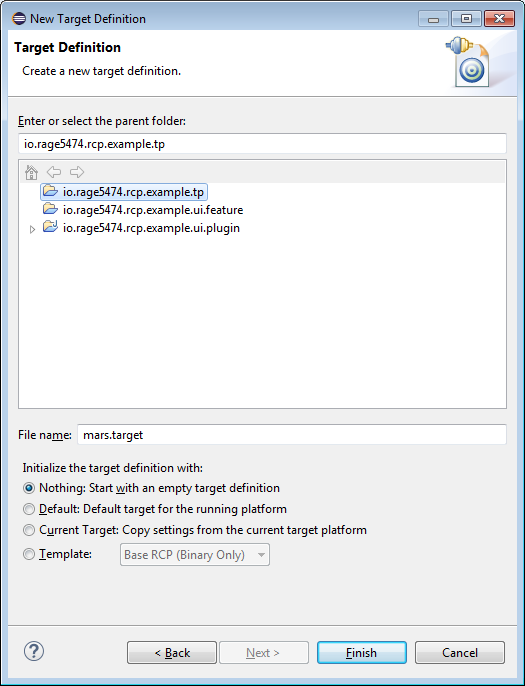
Now select the our target platform plug-in io.rage5474.rcp.example.tp, add mars.target as File name and select the option Nothing from the section Initialize the target definition with: and click Finish.
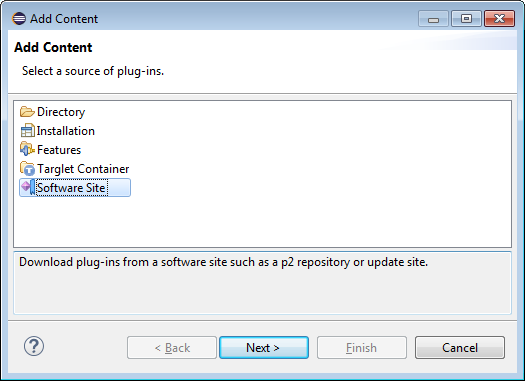
Now we have our third plug-in. At the moment our Target Definition file is empty. So open it with a double-click on the file mars.target and click the Add button to add a Software Site to this Target Definition.
Select Software Site and click Next.
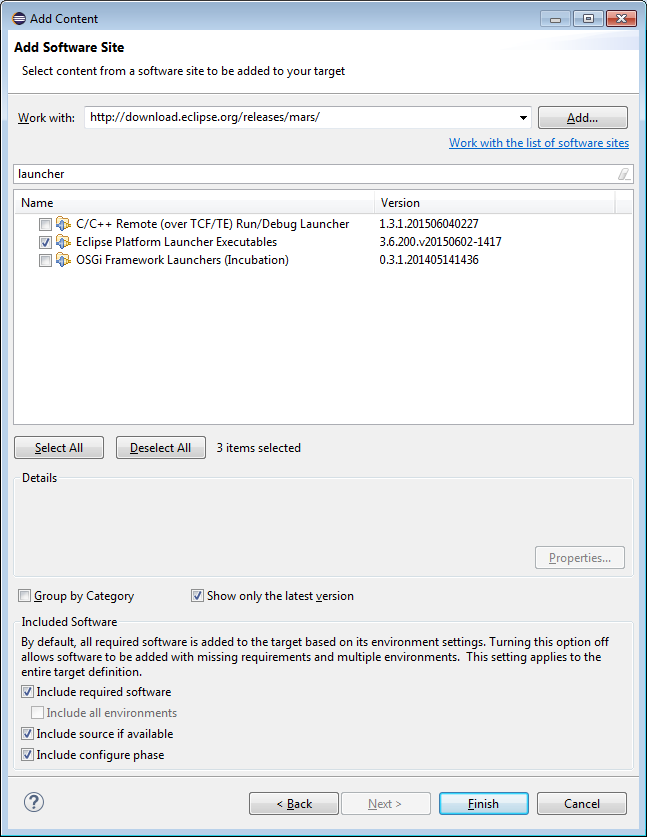
Enter following URL in the field Work with and hit enter: http://download.eclipse.org/releases/mars . Search and select following three features:
-
Eclipse RCP
-
Equinox p2, minimal support for RCP applications
-
Eclipse Platform Launcher Executables
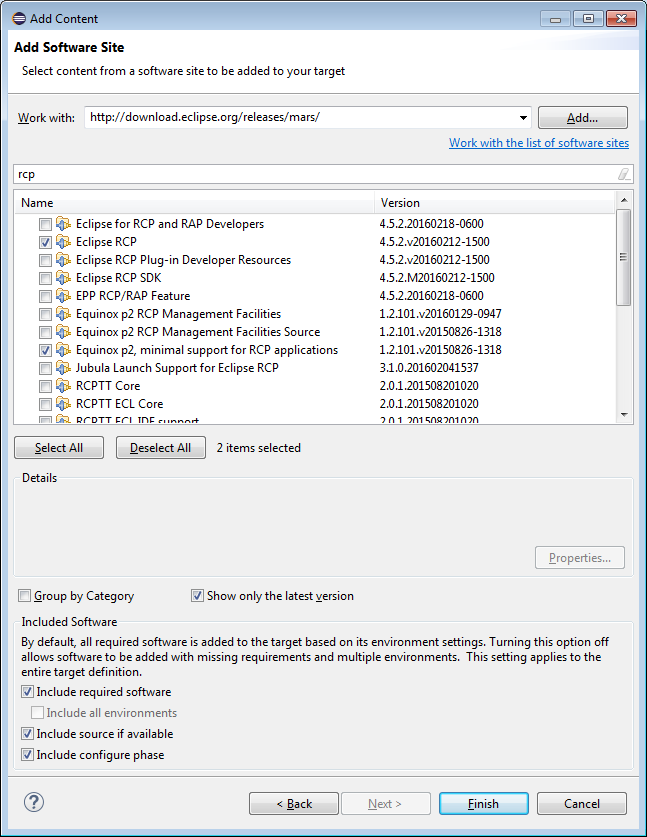
Use the search field to find the right feature fast. Tip: Disable Group by Category.
Click on Finish and click Set as Target Platform. After a while the target platform should be available.
Create sample product
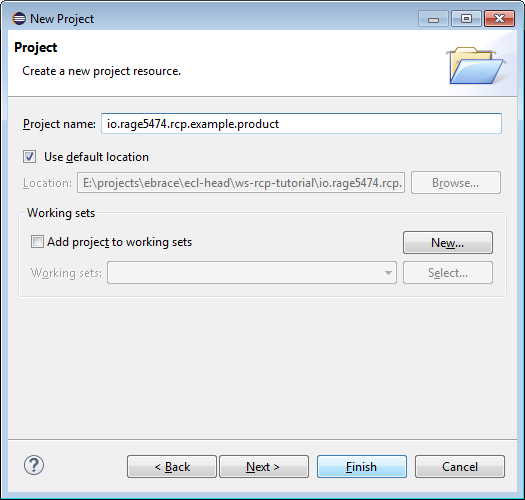
So we almost finished. We only need the possibility to start our application, therefore we need a product file. We separate this again in a new plug-in. We start again with File → New → Other and select Project from the folder General and enter the plug-ins name io.rage5474.rcp.example.product and click Finish.
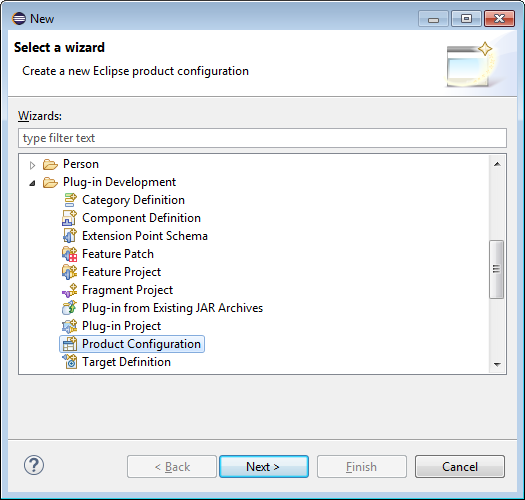
Now we have to add a Product Configuration file to that plug-in. We create this with File → New → Other and select Product Configuration from the folder Plug-in Development and click Next.
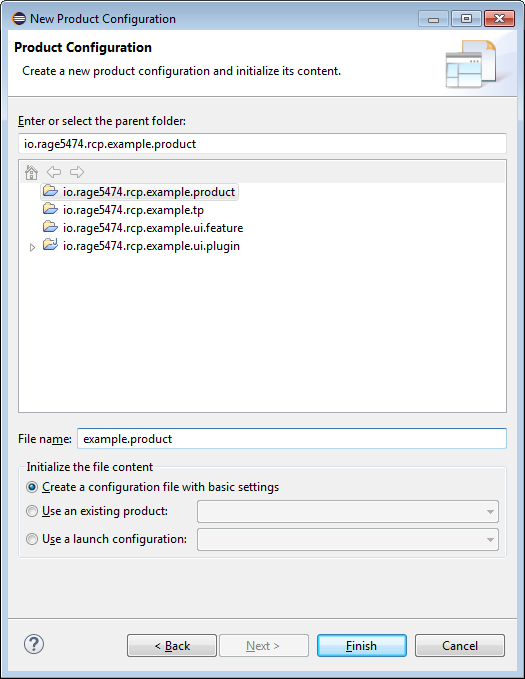
Select the right plug-in (io.rage5474.rcp.example.product) and enter a product configuration file name, here example.product and click Finish.
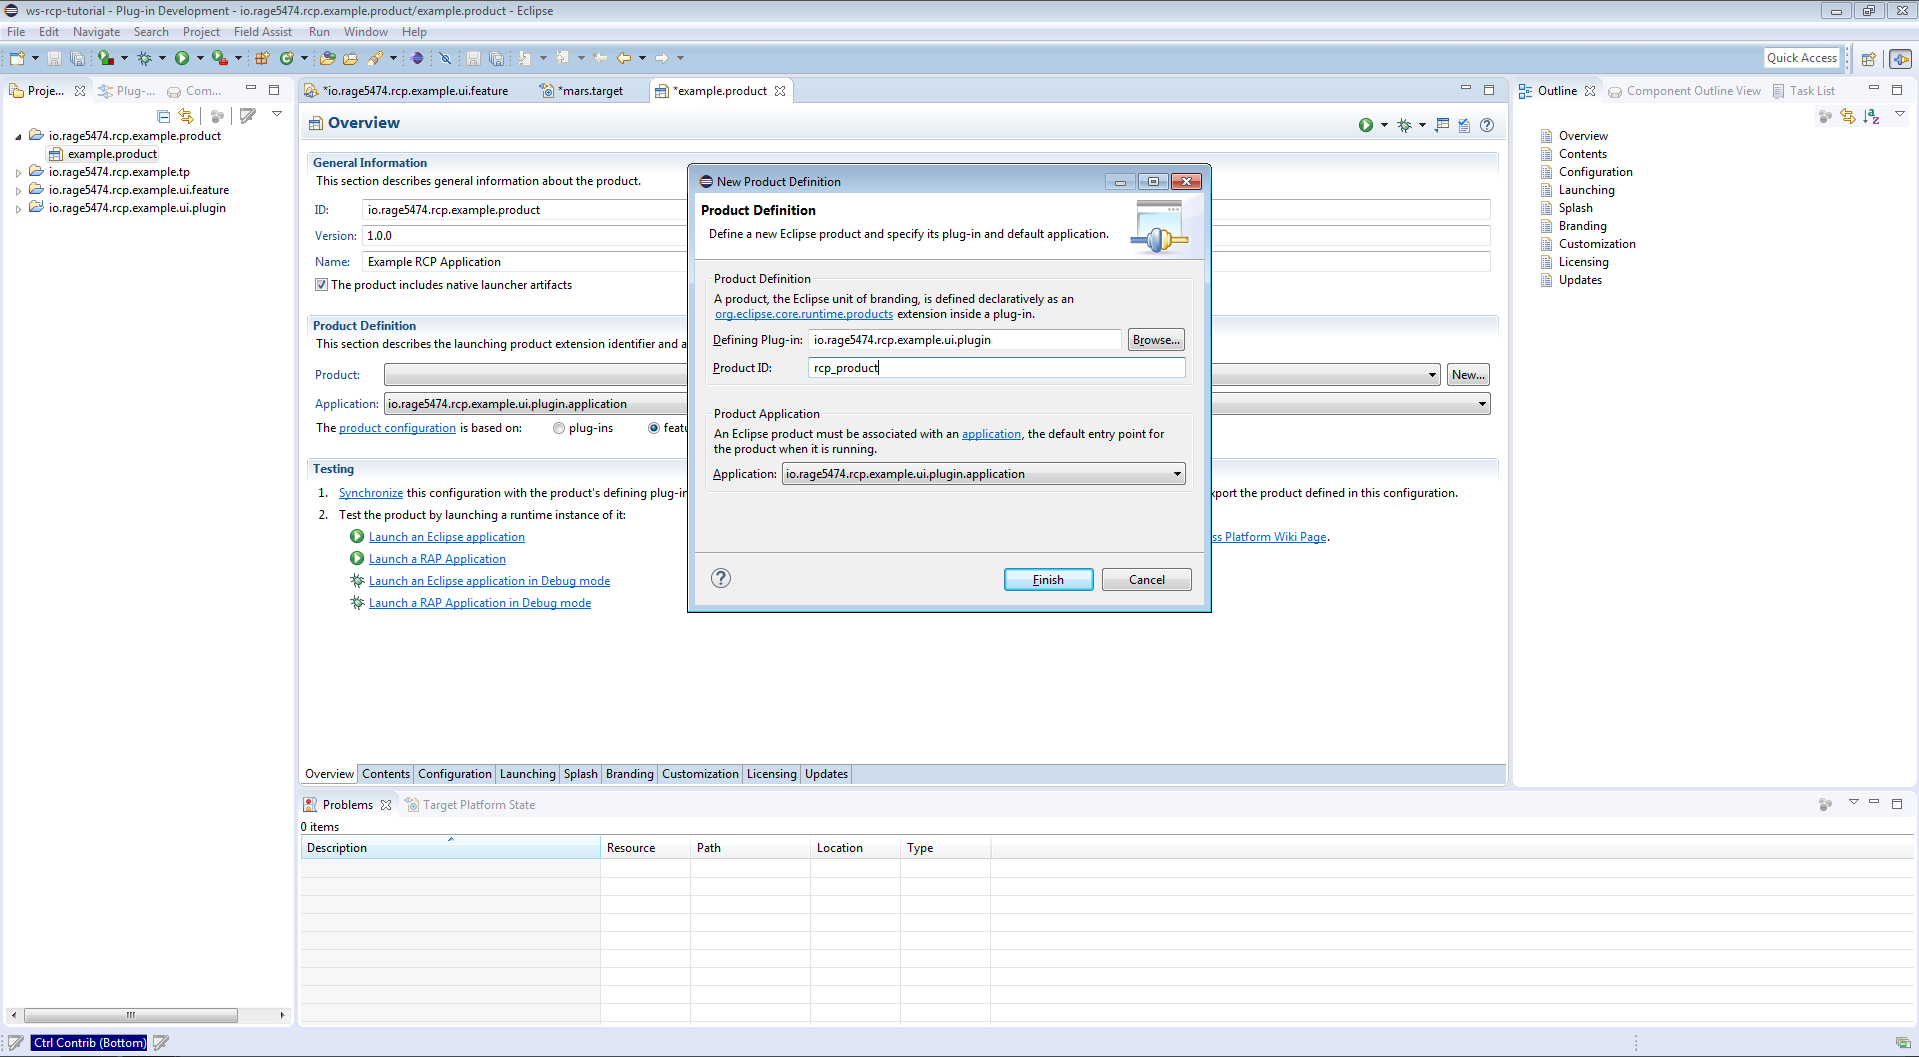
Now we have to configure our product. Open the product file (example.product) by double clicking. Click on new and select the plug-in io.rage5474.rcp.example.ui.plugin in the field Defining Plug-in and enter a Product ID, e.g. rcp_product. Before clicking Finish switch the toogle button from plug-ins to features.
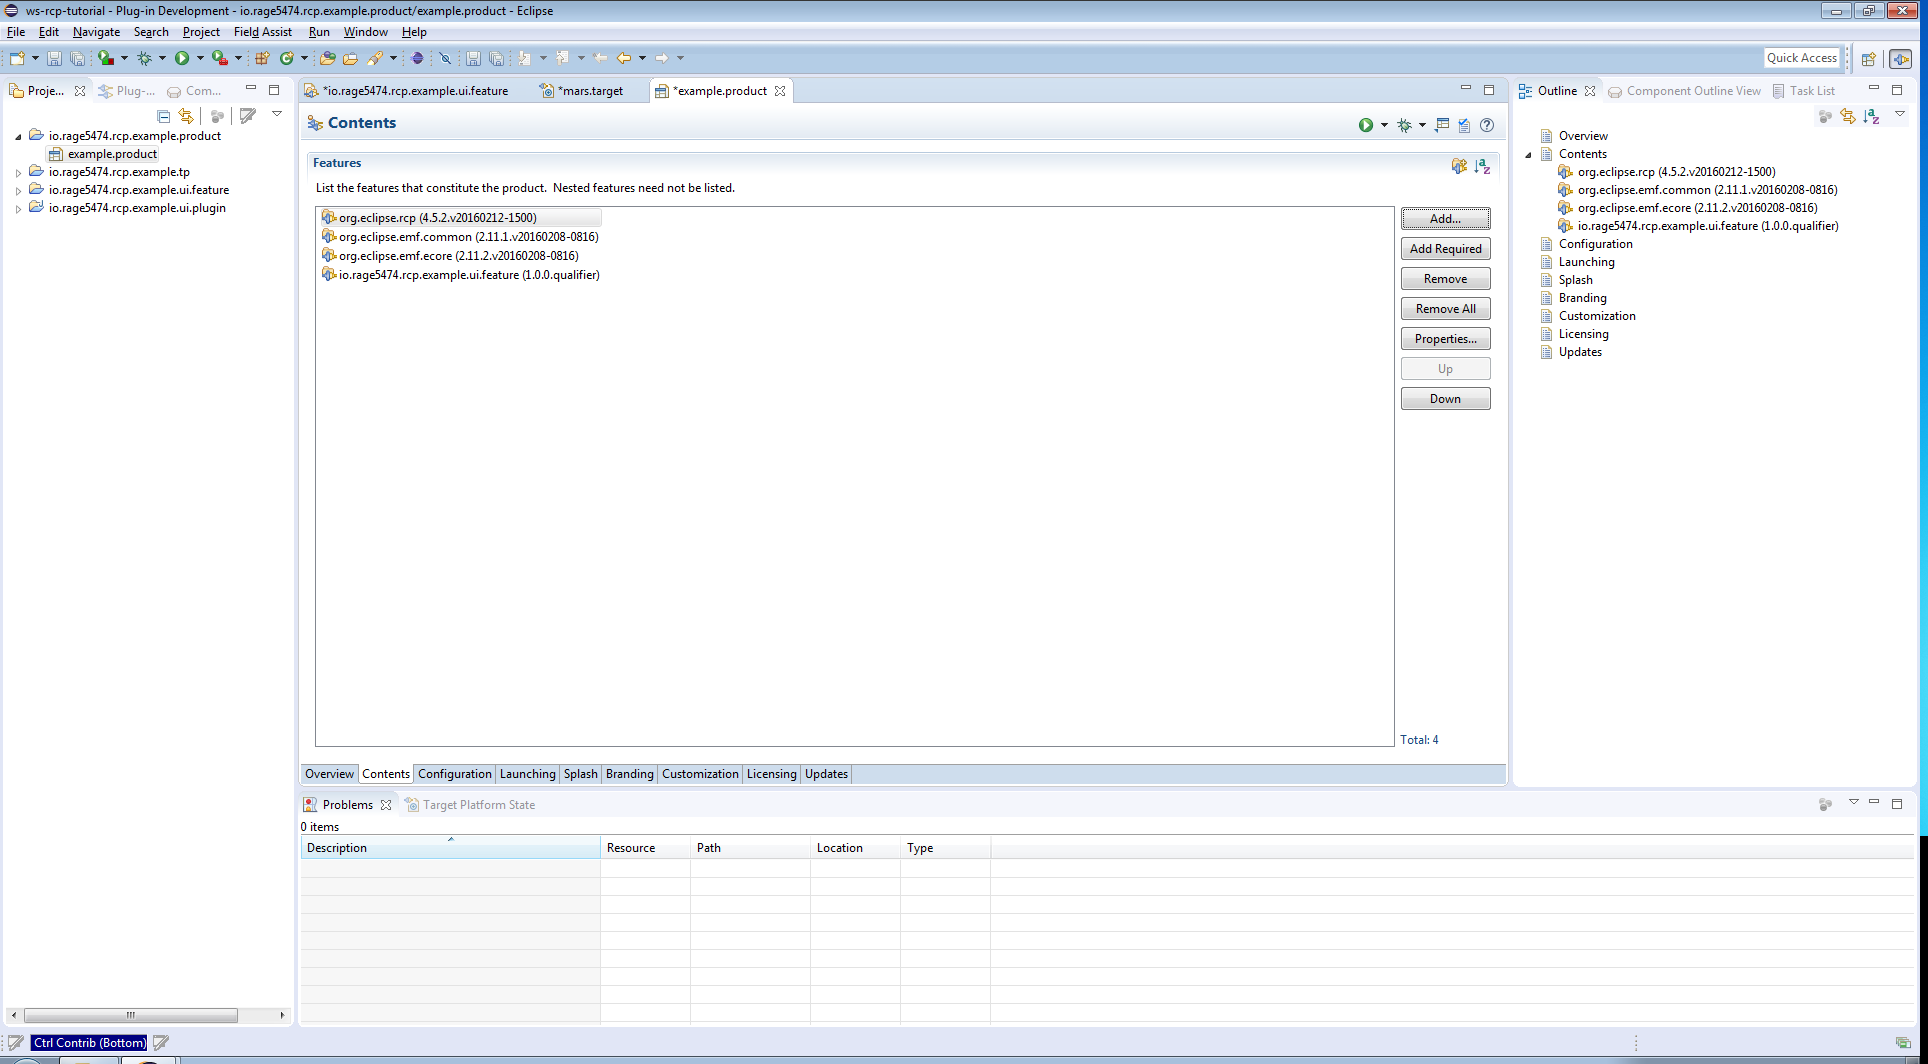
Now switch to the tab Contents and add following feature by clicking on the Add button:
-
org.eclipse.rcp
-
org.eclipse.emf.common
-
org.eclipse.emf.ecore
-
io.rage5474.rcp.example.ui.feature
Now we have to modify the run configuration. Switch to the tab Configuration and select Add Recommended.
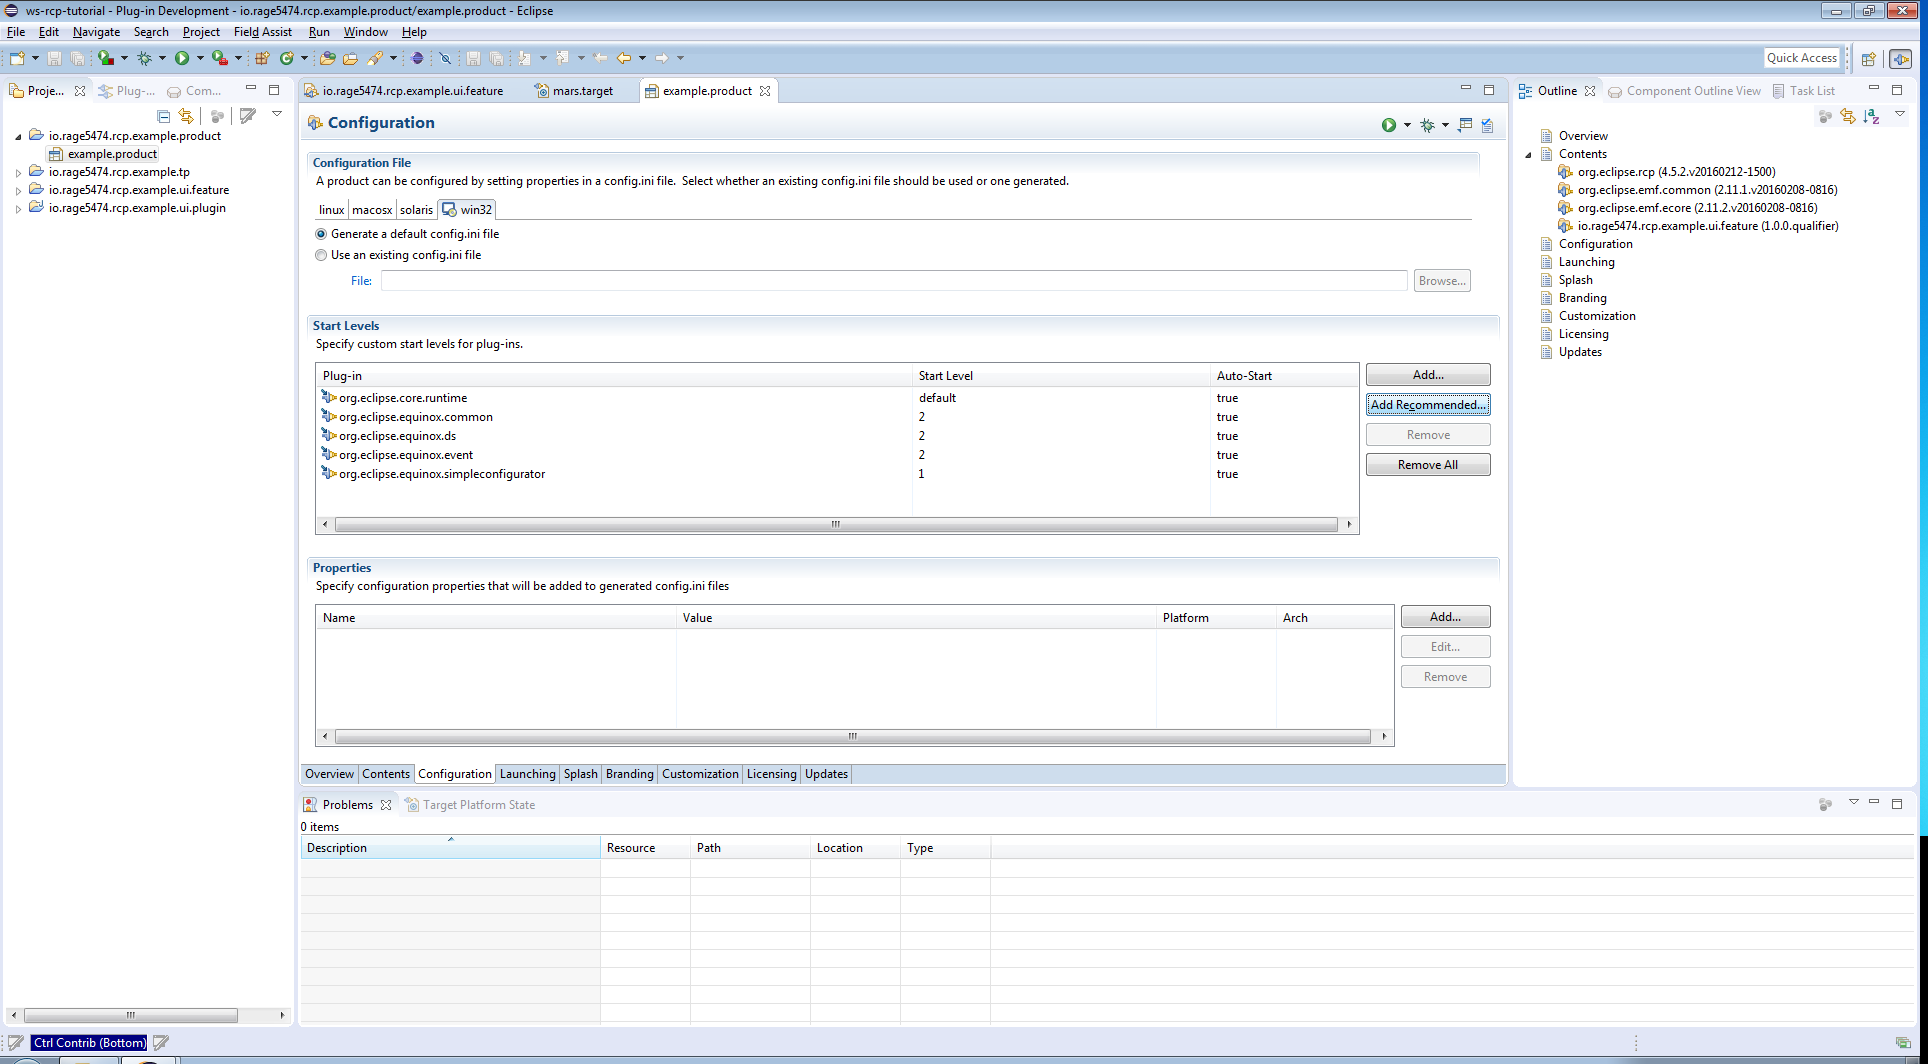
Save your product definition file (CTRL-S) and switch back to the tab Overview and click the link Synchronize from the section Test.
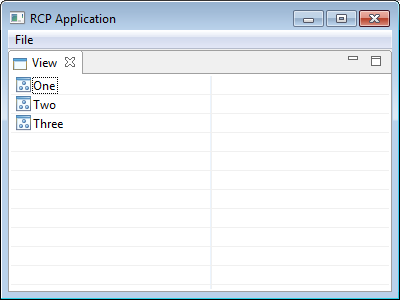
Launch example application
Now we can give it a try. Click the link Launch an Eclipse Application again from the section Testing. The result should look similar to this:
Source Code
The full example source code can also be found here: https://github.com/rage5474/rcp.3.x.comp.layer.example .